F.A.I.T.H. — Settimana 2: controller rifatto, filesystem recuperato e seconda 3060 dichiarata morta
La seconda settimana di F.A.I.T.H. “in produzione” è stata meno patinata e molto più reale: controller RAID smontato e ricostruito, filesystem da rianimare e una RTX 3060 che, dopo molti test, ha guadagnato una diagnosi definitiva: morta.
Scegli come leggere questa storia
Versione tecnica — Settimana 2 su Diablo
Diablo è il nodo su cui sto portando in produzione F.A.I.T.H.: un server dual Xeon E5 su mainboard Intel S2600CW, controller RAID dedicato, SSD SATA e GPU consumer RTX 3060.[file:19] Dopo la prima settimana il focus è passato da “far partire tutto” a “rendere la macchina affidabile sotto carico reale”.
1. Rifare il raffreddamento del controller RAID
Nel primo articolo avevo raccontato del fix temporaneo “alla Restarter” con tasselli per tenere premuto il dissipatore del controller RAID. Era una soluzione d’emergenza: serviva un intervento serio prima di poter fidarsi della macchina in produzione.
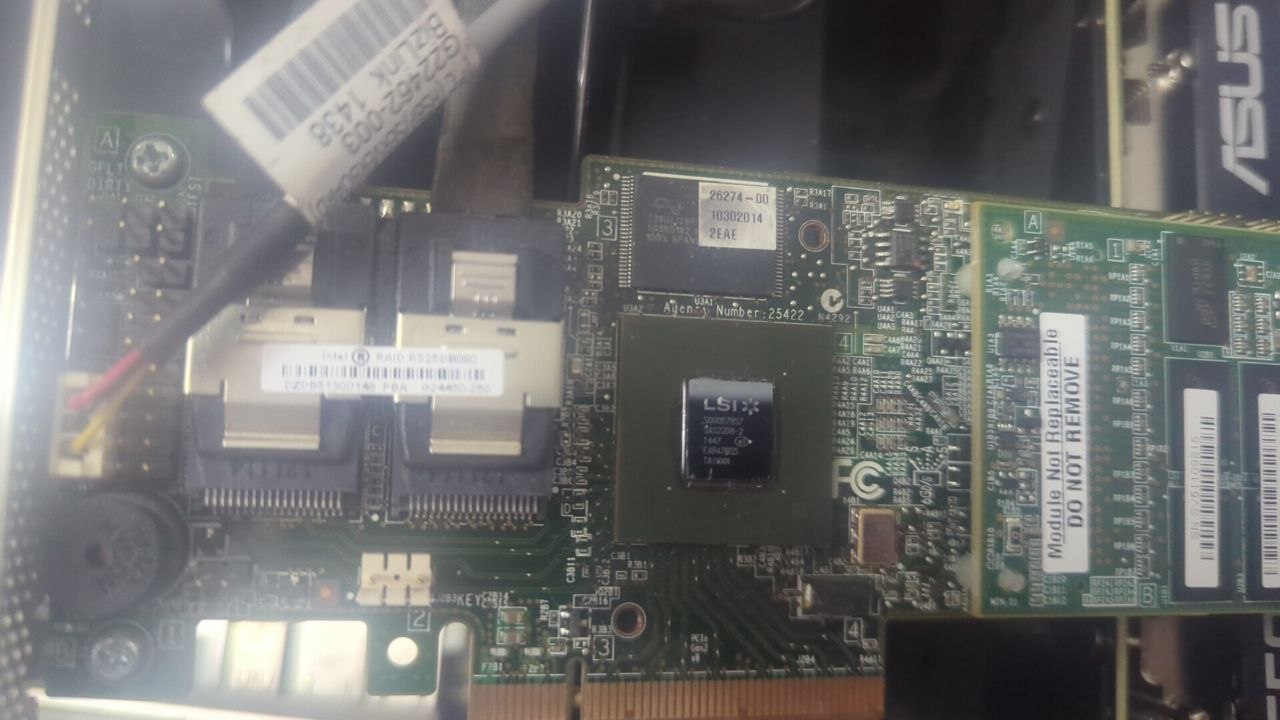
La vecchia pasta termica era secca, irregolare e in alcuni punti semplicemente assente. Le clip a molla in plastica non garantivano più una pressione uniforme sul chip, il che spiegava bene le temperature fuori scala viste nei test della settimana 1.
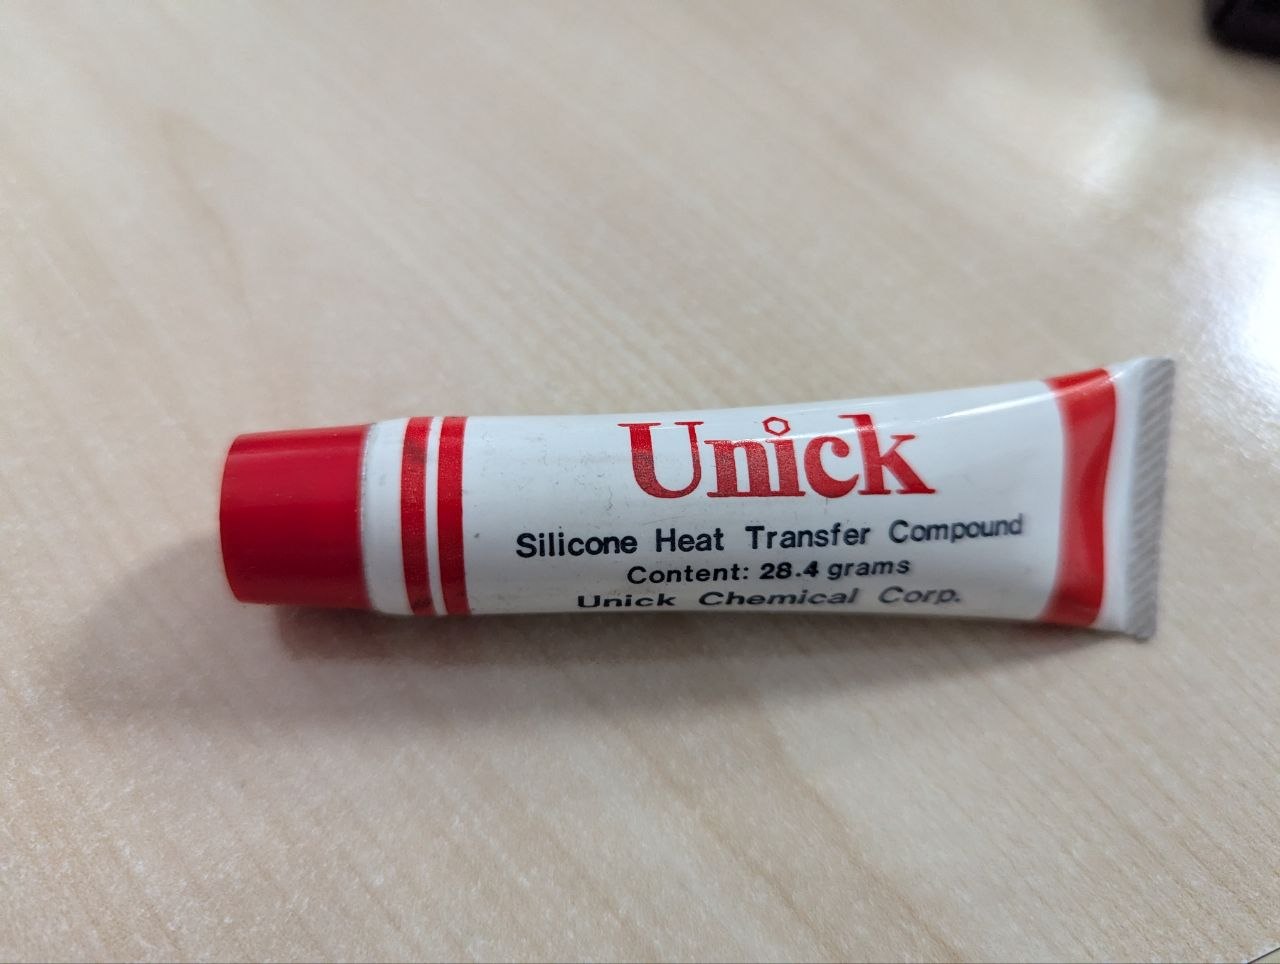
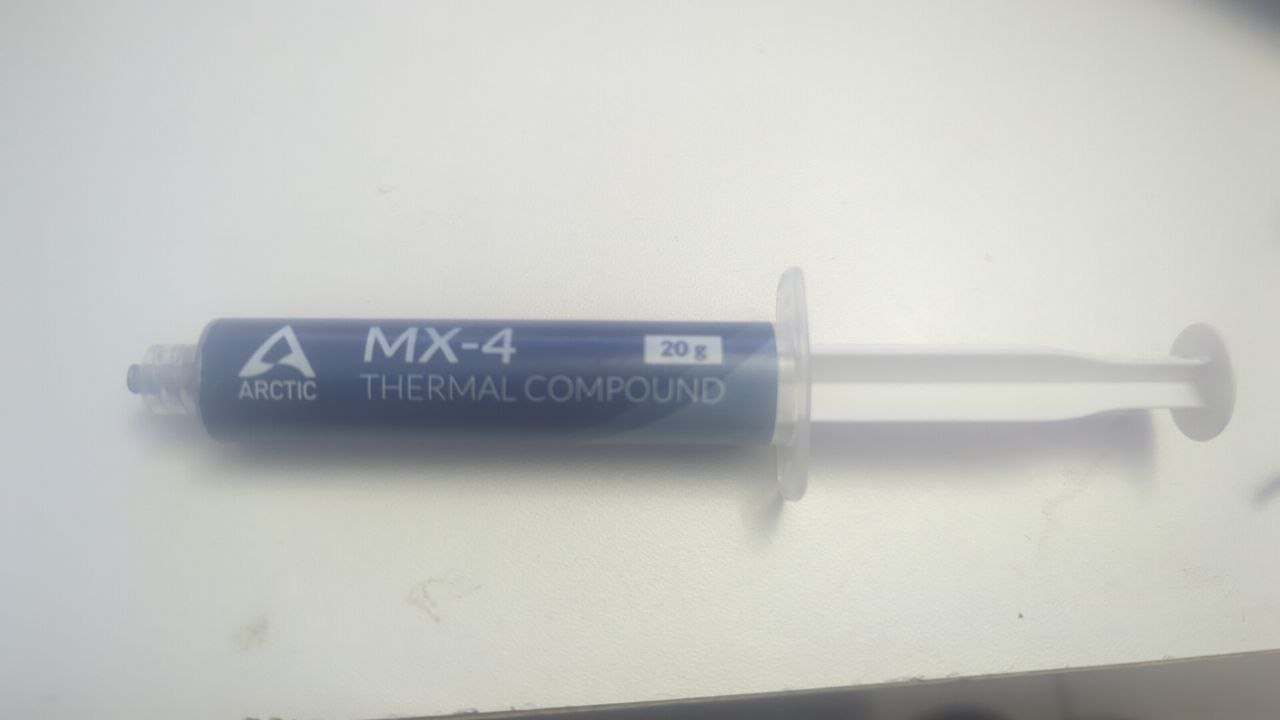
Dopo la pulizia con alcol isopropilico ho scelto una pasta termica decente, non “quella che capita”: Arctic MX‑4. Strato sottile, uniforme, niente esagerazioni.
Per il fissaggio ho recuperato vitine di plastica “a molla” da una vecchia GPU, aggiungendo rondelle sul retro del PCB per distribuire meglio la pressione. Dopo il rimontaggio, il primo test è stato verificare che il controller vedesse ancora dischi e array in modo coerente.
storcli /c0 show
storcli /c0 /eall /sall show
Poi sono passato al punto cruciale: la temperatura. Con il dissipatore rimesso e la nuova pasta, il comando
storcli /c0 show temperature
ora restituisce, fra le altre righe, questo blocco:
Controller Properties :
=====================

--------------------------------------
Ctrl_Prop                       Value
--------------------------------------
ROC temperature(Degree Celsius) 70
--------------------------------------
70 °C sotto carico controllato è un altro pianeta rispetto ai valori da “eruzione” della settimana precedente, soprattutto considerando che parliamo di un controller RAID con carichi I/O intensivi.
2. Temperature di CPU e assorbimento complessivo
Con il controller in condizioni sane ho verificato anche lo stato termico dei due Xeon e
il consumo complessivo di Diablo. I dati vengono da un run reale di
sensors eseguito durante i test:
root@diablo:~# sensors
coretemp-isa-0001
Adapter: ISA adapter
Package id 1:  +67.0°C  (high = +75.0°C, crit = +85.0°C)
Core 0:        +60.0°C  (high = +75.0°C, crit = +85.0°C)
Core 1:        +59.0°C  (high = +75.0°C, crit = +85.0°C)
Core 2:        +61.0°C  (high = +75.0°C, crit = +85.0°C)
Core 3:        +59.0°C  (high = +75.0°C, crit = +85.0°C)
Core 4:        +61.0°C  (high = +75.0°C, crit = +85.0°C)
Core 5:        +59.0°C  (high = +75.0°C, crit = +85.0°C)

power_meter-acpi-0
Adapter: ACPI interface
power1:      242.00 W  (interval =   1.00 s)

coretemp-isa-0000
Adapter: ISA adapter
Package id 0:  +63.0°C  (high = +75.0°C, crit = +85.0°C)
Core 0:        +58.0°C  (high = +75.0°C, crit = +85.0°C)
Core 1:        +60.0°C  (high = +75.0°C, crit = +85.0°C)
Core 2:        +59.0°C  (high = +75.0°C, crit = +85.0°C)
Core 3:        +59.0°C  (high = +75.0°C, crit = +85.0°C)
Core 4:        +58.0°C  (high = +75.0°C, crit = +85.0°C)
Core 5:        +58.0°C  (high = +75.0°C, crit = +85.0°C)
Con CPU intorno ai 63–67 °C di package e un assorbimento di circa 240 W, il profilo termico complessivo della macchina è finalmente coerente con un server dual Xeon sotto test, non con un esperimento borderline.
3. Filesystem “a puttane” e recupero con SystemRescueCD
La parte meno simpatica è stata scoprire le conseguenze delle instabilità precedenti: al boot, Diablo ha iniziato a mostrare errori gravi sul filesystem di root, con messaggi che portavano dritti in emergency mode.
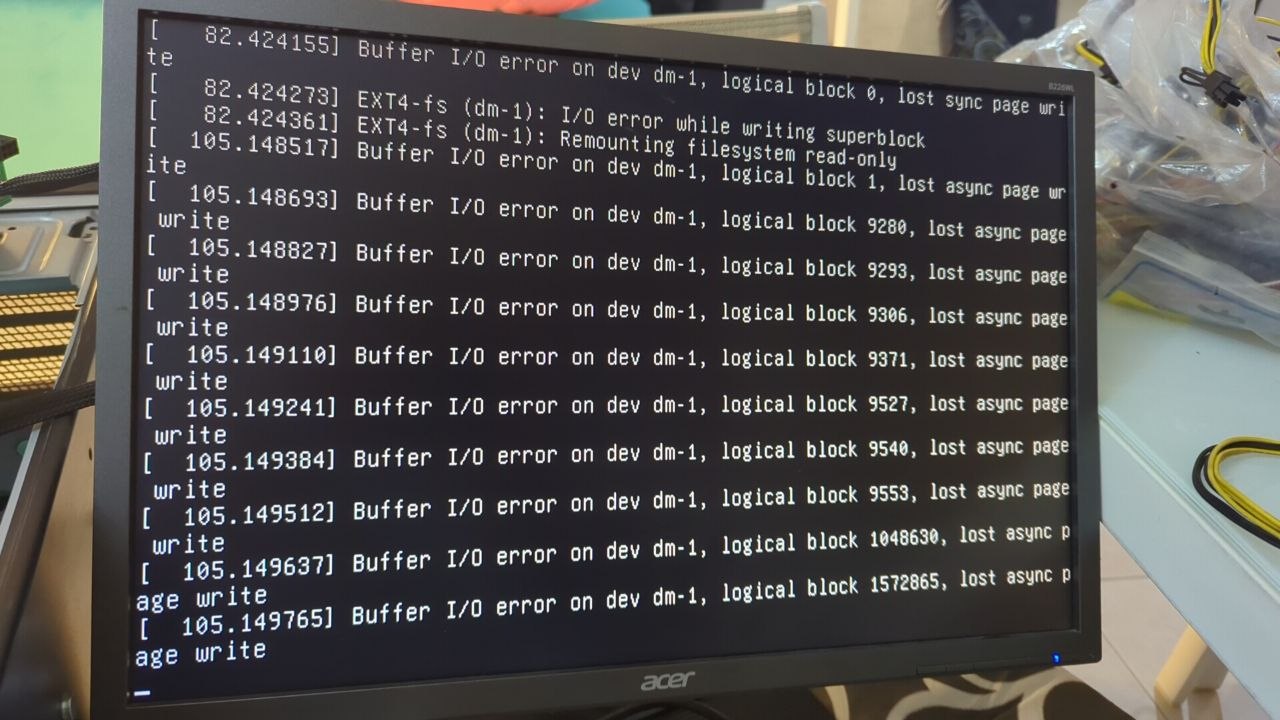
Ogni tentativo di spegnimento “gentile” portava a uno shutdown che non finiva mai, con messaggi del tipo:
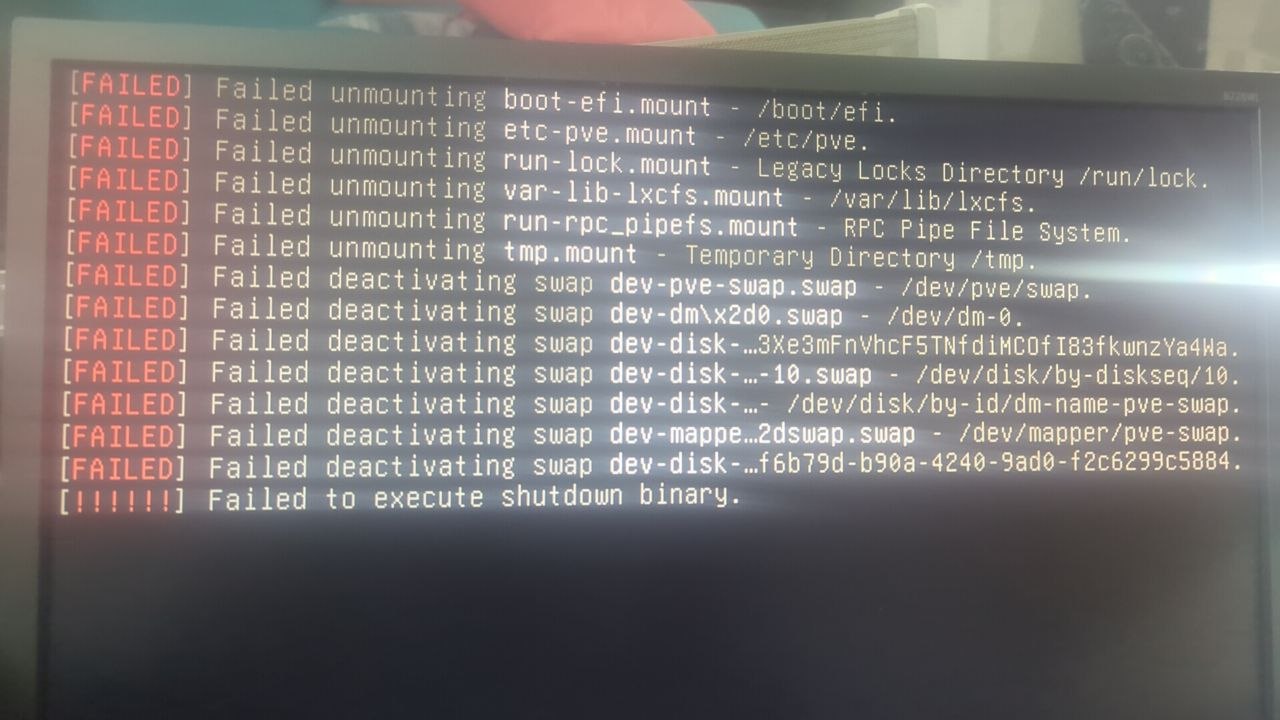
A quel punto la decisione più sana è stata fermare tutto, avviare SystemRescueCD e lavorare
“da fuori”. Prima di lanciare qualsiasi fsck ho verificato il layout reale dei
volumi:
lsblk -o NAME,MAJ:MIN,RM,SIZE,RO,TYPE,MOUNTPOINTS

# Estratto reale da Diablo:
NAME        MAJ:MIN RM   SIZE RO TYPE MOUNTPOINTS
loop0         7:0    0 108.7M  1 loop
loop1         7:1    0 611.0M  1 loop
sda           8:0    0   2.6T  0 disk
├─sda1        8:1    0 1007.0K 0 part
├─sda2        8:2    0     1G  0 part
└─sda3        8:3    0   2.6T  0 part
  ├─pve-swap 252:2   0     8G  0 lvm
  ├─pve-root 252:3   0    96G  0 lvm
  └─pve-poolmetadata0
              252:4  0  15.9G  0 lvm
sdb          8:16    1  57.6G  0 disk
├─sdb1       8:17    1  57.6G  0 part
└─sdb2       8:18    1    32M  0 part
Confermato che il volume root era /dev/mapper/pve-root, ho lanciato
fsck in modalità forzata (a filesystem smontati):
fsck.ext4 -f /dev/mapper/pve-root
fsck.ext4 -f /dev/mapper/pve-poolmetadata0
Molto output, molte domande “Fix? yes”, ma alla fine il filesystem è tornato in uno stato coerente e Diablo ha ripreso a fare il boot senza emergency mode e senza blocchi in spegnimento.
4. Simulare il case chiuso senza chiuderlo davvero
Prima di tornare ai carichi AI, serviva capire se il nuovo profilo termico reggeva anche con un flusso d’aria più simile a quello reale. Non volevo chiudere completamente il case (era ancora laboratorio, non produzione), quindi ho optato per una “simulazione di case chiuso”.
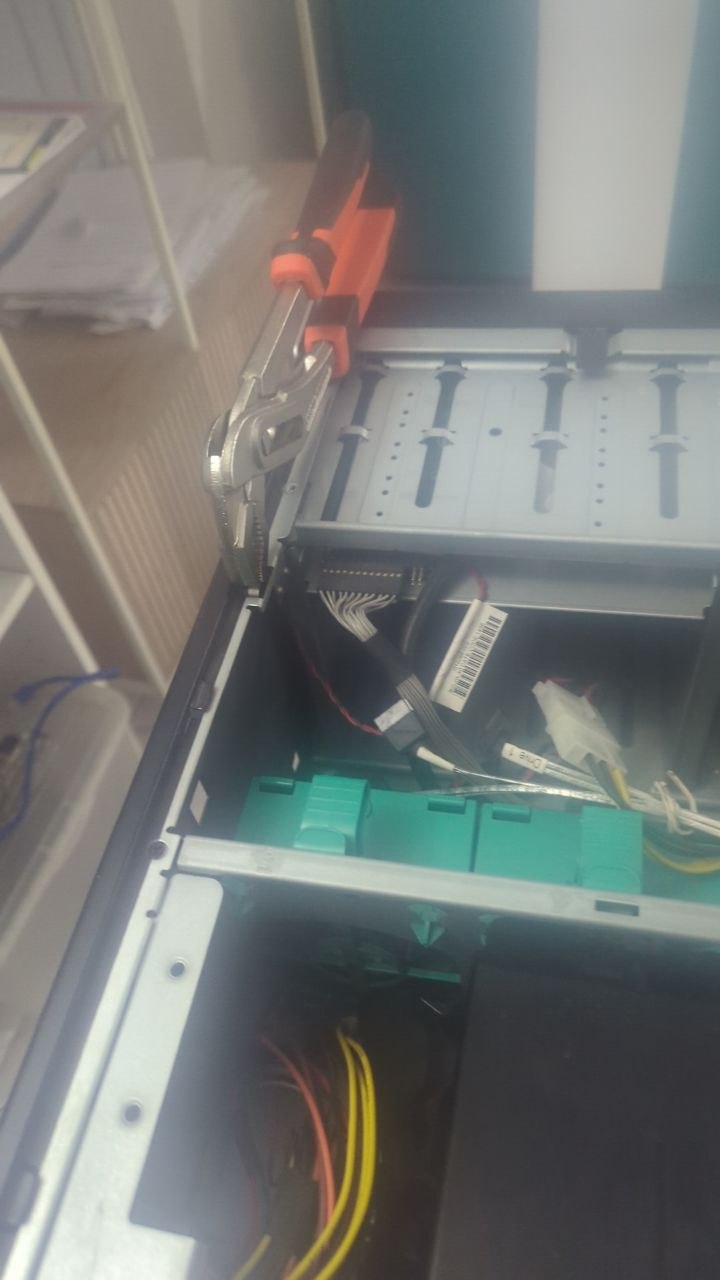
Con questa configurazione ho potuto rifare test I/O e termici controllando in parallelo
storcli per il controller, sensors per le CPU e
nvidia-smi per le GPU. Nessun allarme, niente spegnimenti improvvisi: via libera
per concentrarsi sul vero “indagato” della settimana, la seconda RTX 3060.
5. Debug della seconda RTX 3060
La seconda 3060 era sospetta fin dalla settimana 1, ma finché il controller non era sotto controllo aveva poco senso giudicare. Stabilizzato il RAID, ho iniziato la classica indagine “un pezzo alla volta”.
Prima gli slot PCIe:
lspci | egrep 'NVIDIA|VGA'
dmesg | grep -i nvidia | tail -n 40
La 3060 “buona” compariva e lavorava in qualsiasi slot. La 3060 sospetta, invece, a volte spariva del tutto, altre generava errori nel kernel del tipo:
NVRM: Xid (PCI:0000:65:00): 79, GPU has fallen off the bus.
Poi i cavi e le rail di alimentazione: scambiando sistematicamente cavi PCIe e connettori sull’alimentatore, la scheda buona continuava a restare stabile, mentre quella sospetta manteneva lo stesso comportamento instabile.
Per escludere in modo definitivo l’alimentatore principale ho provato anche un alimentatore modulare esterno “stile miner”, alimentando solo la GPU sospetta e monitorando:
nvidia-smi --query-gpu=name,pci.bus_id,temperature.gpu,power.draw --format=csv
watch -n 2 nvidia-smi
Risultato invariato: errori, sparizioni sporadiche dal bus PCIe e reset del driver. A quel punto l’unica variabile davvero costante era la scheda stessa.
6. La morte conclamata della seconda 3060
Dopo giorni di prove incrociate la diagnosi è diventata inevitabile. I sintomi finali:
-
lspciche a volte non mostrava proprio la seconda GPU, anche a freddo. -
nvidia-smiche restituiva errori tipo:Unable to determine the device handle for GPU 0000:65:00.0: Unknown Error - Kernel log pieno di Xid 79 “GPU has fallen off the bus” sulla stessa PCIe, indipendentemente da slot, cablaggi e alimentazione.
- Nessun problema sulla 3060 sana, qualunque cosa le facessi.
Non c’era più motivo di insistere: la seconda 3060 è stata dichiarata ufficialmente morta e messa in lista per lo smaltimento/riuso “soft”. La roadmap prevede ora l’arrivo di un’altra 3060 usata, con una batteria di test dedicata prima di entrare nella configurazione ufficiale di F.A.I.T.H.
Versione narrativa — Settimana 2: quando l’hardware decide di parlarti chiaro
La seconda settimana di F.A.I.T.H. è stata quella in cui la macchina ha smesso di essere solo un’idea e ha iniziato a comportarsi come quello che è davvero: ferro vissuto, con umori, limiti e qualche acciacco.
Il primo passo è stato mettere le mani sul controller RAID, togliere il dissipatore e guardarlo in faccia, senza filtri. Sotto c’era una pasta termica secca, spalmata male, con il chip scoperto in più punti. Non serviva essere un termico per capire che in quelle condizioni nessun controller sarebbe rimasto lucido a lungo.
Rifare la pasta termica con qualcosa di decente e rimettere pressione sul dissipatore con vitine recuperate da una vecchia GPU è stato un gesto quasi simbolico: prendersi cura di un componente che il mercato considera già vecchio, ma che può ancora fare il suo lavoro se gli dai le condizioni giuste.
Da lì in poi la storia si sposta sul filesystem. Quando il controller inizia a fare il suo dovere, emergono le cicatrici di ciò che è successo prima: errori EXT4, emergency mode, spegnimenti che non finiscono mai. Non è la parte romantica del lavoro, ma è quella che decide se un progetto resta un POC o diventa infrastruttura.
È in quei momenti che strumenti come SystemRescueCD diventano compagni di viaggio: non tanto per “salvare la baracca”, ma per rimettere insieme i pezzi in modo che la prossima volta la storia si ripeta un po’ meno spesso.
Intanto, in un angolo del case, la seconda RTX 3060 continuava la sua personale campagna di resistenza passiva: a volte presente, a volte scomparsa, a volte protagonista di log pieni di “GPU has fallen off the bus”. L’ho spostata di slot, le ho cambiato cavi, alimentatori, contesto. Ma i sintomi hanno continuato a seguire lei, non il resto.
A un certo punto l’onestà tecnica ti impone di smettere di sperare e iniziare ad accettare: quella scheda non è più affidabile. Non è un fallimento, è solo un pezzo di ferro che ha finito il suo ciclo utile in quel ruolo. Il valore sta nel non buttar via tutto il resto insieme a lei.
In fondo, questa settimana racconta proprio questo: prendersi il tempo per capire cosa si può salvare, cosa si può riparare e cosa, invece, va salutato. F.A.I.T.H. cresce dentro queste decisioni lente, più che nei benchmark.
English technical version — Week 2 on Diablo
Diablo is the node where F.A.I.T.H. is being pushed into real‑world conditions: dual Xeon E5 on an Intel S2600CW board, dedicated RAID controller, SATA SSDs and consumer RTX 3060 GPUs.[file:19] After week 1, the priority shifted from “booting everything” to “keeping the machine stable under sustained load”.
1. Rebuilding the RAID controller cooling
The first step was to move from a temporary “Restarter‑style” fix with wall plugs to a proper thermal rework of the Intel RS25DB080 controller. That meant removing the heatsink, cleaning up the old silicone paste and rebuilding the mounting system.
After cleaning the die and the heatsink base with isopropyl alcohol, I applied a thin and uniform layer of Arctic MX‑4 and reused spring‑style plastic screws from an old GPU to restore even pressure across the package.
With the heatsink back in place, the next check was temperature. The command:
storcli /c0 show temperature
now includes the following block:
Controller Properties :
=====================

--------------------------------------
Ctrl_Prop                       Value
--------------------------------------
ROC temperature(Degree Celsius) 70
--------------------------------------
A ROC temperature of 70 °C under controlled load is a very different story from the near‑eruption levels seen before, and is coherent with the kind of RAID6 workload this controller is expected to handle.
2. CPU temperatures and overall power draw
With the controller behaving better, I checked the thermal profile of both CPUs and the
overall power draw using a real sensors run on Diablo:
root@diablo:~# sensors
coretemp-isa-0001
Adapter: ISA adapter
Package id 1:  +67.0°C  (high = +75.0°C, crit = +85.0°C)
Core 0:        +60.0°C  (high = +75.0°C, crit = +85.0°C)
Core 1:        +59.0°C  (high = +75.0°C, crit = +85.0°C)
Core 2:        +61.0°C  (high = +75.0°C, crit = +85.0°C)
Core 3:        +59.0°C  (high = +75.0°C, crit = +85.0°C)
Core 4:        +61.0°C  (high = +75.0°C, crit = +85.0°C)
Core 5:        +59.0°C  (high = +75.0°C, crit = +85.0°C)

power_meter-acpi-0
Adapter: ACPI interface
power1:      242.00 W  (interval =   1.00 s)

coretemp-isa-0000
Adapter: ISA adapter
Package id 0:  +63.0°C  (high = +75.0°C, crit = +85.0°C)
Core 0:        +58.0°C  (high = +75.0°C, crit = +85.0°C)
Core 1:        +60.0°C  (high = +75.0°C, crit = +85.0°C)
Core 2:        +59.0°C  (high = +75.0°C, crit = +85.0°C)
Core 3:        +59.0°C  (high = +75.0°C, crit = +85.0°C)
Core 4:        +58.0°C  (high = +75.0°C, crit = +85.0°C)
Core 5:        +58.0°C  (high = +75.0°C, crit = +85.0°C)
Around 63–67 °C on the packages and roughly 242 W of power draw are perfectly acceptable figures for a dual Xeon system under test, and confirm that the thermal situation is no longer out of control.
3. Filesystem damage and recovery with SystemRescueCD
Previous instability left its mark on the storage stack. At boot, the root filesystem started throwing EXT4 errors and dropped straight into emergency mode, making normal operations impossible until the underlying issues were addressed.
The only sane decision at that point was to boot from SystemRescueCD, inspect the layout
with lsblk, confirm the LVM topology and run fsck on the affected
volumes. After a long sequence of “Fix? yes”, Diablo came back to life with a clean root
and a normal shutdown behaviour.
4. Simulating a closed case
Before going back to AI workloads, I wanted to be sure the new thermal setup would hold in conditions closer to production. Instead of fully closing the chassis, I opted for a “semi‑closed” configuration: airflow guides and panels in place, but with quick access to the RAID controller, PCIe slots and cabling.
With this setup, temperature monitoring via storcli, sensors and
nvidia-smi confirmed that the controller, CPUs and GPU were behaving within
reasonable limits. That cleared the way to focus on the real suspect of the week:
the second RTX 3060.
5. Second RTX 3060: from suspicion to hard verdict
The second 3060 had been unstable since week 1, but as long as the storage layer was sick, pointing fingers at the GPU would have been premature. Once the controller and filesystem were stable, I started a systematic investigation.
First came PCIe slot swaps and basic checks:
lspci | egrep 'NVIDIA|VGA'
dmesg | grep -i nvidia | tail -n 40
The “good” 3060 worked fine in every slot. The suspect one sometimes disappeared from
lspci, and when it did show up it occasionally triggered:
NVRM: Xid (PCI:0000:65:00): 79, GPU has fallen off the bus.
Cable and power rail swaps, plus tests with an external modular PSU, all pointed in the same
direction: the problem followed the card, not the rest of the system. Eventually, even
nvidia-smi started returning:
Unable to determine the device handle for GPU 0000:65:00.0: Unknown Error
At that point, declaring the card dead was not pessimism — it was simply acknowledging what the data had been saying for days.
English narrative version — Week 2: when hardware starts telling the truth
Week 2 of F.A.I.T.H. is when the machine stopped being an abstract idea and started behaving like what it really is: used hardware, with its own mood, limits and scars.
Taking the heatsink off the RAID controller and looking at it “naked” was a revealing moment: dry paste, uneven contact, a chip that had clearly been working harder than the cooling solution deserved. Reapplying proper paste and rebuilding the mounting was less about performance and more about respect.
Then came the filesystem: EXT4 errors, emergency mode, shutdowns that would never finish. Not exactly a glamorous part of building an AI stack, but precisely the kind of work that decides whether a project stays a prototype or becomes infrastructure.
fsck.
Meanwhile, the second RTX 3060 kept playing hide‑and‑seek with the system: sometimes present, sometimes missing, sometimes leaving behind a trail of “GPU has fallen off the bus” messages in the logs. Slot swaps, cable swaps, power rail swaps — in every configuration the pattern stayed the same: the instability followed the card.
Eventually, honesty wins over hope. Declaring the card dead was not a defeat, it was a way of protecting the rest of the machine and the time invested in the project. A broken GPU can be replaced; a silently corrupted dataset or a half‑broken RAID is much harder to fix.
F.A.I.T.H. grows exactly in these in‑between spaces: between repair and replacement, between “it still works” and “it is time to retire this part”. Building local‑first AI on reused hardware is not about pretending everything is fine; it is about listening when the hardware starts telling the truth.